Firebase Cloud Storage Vs Realtime Database
People today expect super speedy response times and instant feedback from their software. Gone are the days when you could refresh your app every minute or add an icon for your users to refresh it themselves: They want SPEED!
This is where Firebase Realtime Database comes in. You no longer need to write complicated apps which use thousands of lines of async tasks and threaded processes to simulate reactiveness. With Realtime Database, you'll be up and running in no time.
Today you'll create the crème de la crème of reactive software: an instant messaging app called RayChat. While creating RayChat, you'll learn:
- About Realtime Database and when to use it.
- The steps required to set up a Firebase project with the Realtime Database.
- How to connect to, query and populate the Realtime Database.
- How to use the Realtime Database to build your own instant messaging app.
Getting Started
Download the starter project by clicking Download Materials at the top or bottom of this tutorial.
Build and run your project in your preferred IDE. This tutorial will use Visual Studio Code. You'll see the RayChat home page:

Right now, your app doesn't do much. You'll need to add your own Realtime Database to send and receive messages.
What is a Realtime Database?
Google gives you the option for two real-time sync databases within the Firebase suite of tools: Cloud Firestore and Firebase Realtime Database. But what's the difference?
Firestore is Google's newest offering. They created Firestore to better cope with large-scale software with deeply layered data. It can query and return each document of data separately, creating a truly elastic environment that copes well as your data set grows.
Realtime Database, though still a document-driven NoSQL database, returns data in JSON format. When you query a tree of JSON data, all of its child nodes also return. To keep your transactions light and nimble, you have to keep your data hierarchy as flat as possible.
Both of these database solutions are great, so it's important to know when to use which. Here are some key metrics for each database:
Cloud Firestore
- Has a free plan, but charges per transaction and to a lesser extent for storage used, past the limit.
- Easier to scale.
- Can handle complex, deeply layered data sets and relations.
- Avaiable for mobile and web.
Firebase Realtime Database
- Also has a free plan, but charges for storage used, not for queries made, past the limit.
- Extremely low latency.
- Easy to store simple data using JSON.
- Available for mobile only.
When creating a chat app, you'll make many transactions and store simple data without making any complex queries. Realtime Database is the clear choice as it's cheaper, easier to use and faster to run.
Check out the full list of comparisons on Google's product page. Switch to our Cloud Firestore tutorial if you're looking to explore the Firestore solution.
Setting up a Google Project and Database
Before you can use any of Google's cloud services, you have to set up a project on the Firebase Console. Then you can create your Realtime Database and manage it directly from the console.
You'll use Google's Free Tier, so completing this tutorial won't cost you a penny! :]
Go to the Firebase Console and click Create a project.

Then name your project RayChat and click Continue.

Disable Google Analytics since you don't need it for this tutorial. Finally, click Create project at the bottom of the page.

Give Google a minute to load and then your project will be ready. Woohoo!
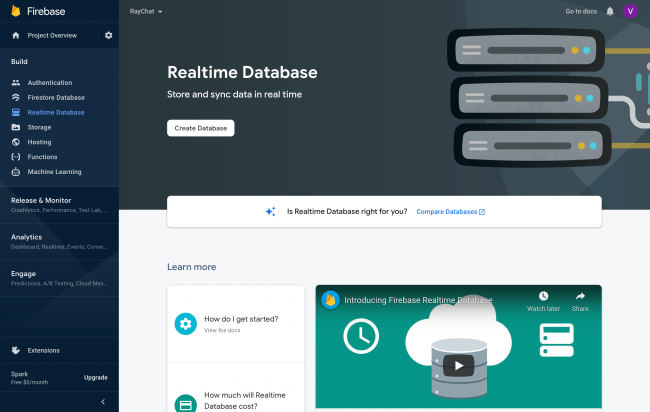
To create your Realtime Database, go back to your Firebase home page and select See all Build features.

Scroll down and click Realtime Database.

Then select Create Database.
Choose the country where you'll store the data, and then select Start in test mode. Starting in test mode ensures you can read and write data easily while developing your app. Then click Enable.

With your database complete, you'll arrive at your database console. You can come back to this page later to see your app data in real time.

Next, you'll connect your Flutter app with your new Google project.
Creating Google Services Files
Google uses a config file that contains all of the API keys for your Firebase project. You'll need to create a config file for your Android and iOS apps individually. Start with Android.
Setting Up Android
On your Firebase console home page, make sure you have RayChat selected as your active project. Then click the Android symbol.

This takes you to a helper page for creating your Android config file. Add com.raywenderlich.RayChat in the package name field and RayChat in the nickname field. Then click Register app.

Wait a couple of seconds for the file to generate. Then click Download google-services.json.

Save google-services.json to android/app.
Note: Don't follow the Firebase console steps under Add Firebase SDK as they assume you're developing an Android native app. Flutter does things a little differently.
In your project, open android/build.gradle. Then add the following dependency at the end of the list in the dependencies section of buildscript:
classpath 'com.google.gms:google-services:4.3.8' Now open android/app/build.gradle and add the Google services plugin after the other apply plugin and apply from entries:
apply plugin: 'com.google.gms.google-services' Now, over to iOS!
Setting Up iOS
You'll need Xcode to set up your iOS project. If you're not using a Mac, feel free to skip this section and build the Android app.
Head back to your Firebase Console home page and click Add app. Then select iOS.

This brings you to the config file generation page for iOS. Like before, add com.raywenderlich.RayChat as your iOS Bundle ID and RayChat as your app nickname.

Register your app and download GoogleService-info.plist.
Note: Don't follow the Firebase console steps for the Add Firebase SDK section as they are not suited to Flutter.
Save GoogleService-info.plist in ios/Runner. Then open your project's ios folder in Xcode.
In Xcode, right-click Runner and select Add Files to "Runner"….

Then select Google-Services-Info.plist from Runner. Make sure you have Copy items if needed checked. Then click Add.

And you're done! Close Xcode. Now you can communicate with your Google project in both your iOS and Android apps produced by Flutter.
Time to start writing some code.
Adding the Flutter Dependencies
Start by adding a dependency for firebase_core and firebase_database in your pubspec.yaml. Add them to the bottom of dependencies:
firebase_core: 1.3.0 firebase_database: 7.1.1 You'll use them in a bit.
Modeling the Data
You have to create a data model to reflect the structure of your chat app messages. In addition to the data model, you'll make a Data Access Object (DAO) that can store and retrieve the messages from your Realtime Database.
Add a new folder inside lib called data. You'll use this folder to store your data models and data access objects.
Adding a Data Model
Create a new file in data called message.dart. Then add a new class with two fields, text and date:
class Message { final String text; final DateTime date; Message(this.text, this.date); } You also need a way to transmute your Message model from JSON since that's how it's stored in your Realtime Database. Add two JSON converter methods to the bottom of your class:
Message.fromJson(Map<dynamic, dynamic> json) : date = DateTime.parse(json['date'] as String), text = json['text'] as String; Map<dynamic, dynamic> toJson() => <dynamic, dynamic>{ 'date': date.toString(), 'text': text, }; The first definition will help you transform the JSON you receive from the Realtime Database, into a Message. The second will do the opposite — transform the Message into JSON, for saving.
Adding a Data Access Object
Create a new file in data called message_dao.dart. This is your DAO for your messages.
Import firebase_database.dart and message.dart. Then create a DatabaseReference which references a node called messages.
import 'package:firebase_database/firebase_database.dart'; import 'message.dart'; class MessageDao { final DatabaseReference _messagesRef = FirebaseDatabase.instance.reference().child('messages'); } This code looks for a JSON document inside your Realtime Database called messages. If it doesn't exist, Firebase will create it.
Now you need MessageDao to perform two functions: saving and retrieving. Add a new function named saveMessage to the bottom of your class.
void saveMessage(Message message) { _messagesRef.push().set(message.toJson()); } This function takes a Message as a parameter and uses your DatabaseReference to save the JSON message to your Realtime Database. Yep, it's only one line of code.
For the retrieval method you only need to expose a Query since you'll use a cool widget called a FirebaseAnimatedList which interacts directly with your DatabaseReference.
Add a getMessageQuery() to your MessageDao:
Query getMessageQuery() { return _messagesRef; } Alright, now you have your message DAO. As the name states, the data access object helps you access whatever data you have stored at the given Realtime Database reference. It will also let you store new data, as you send messages. Now all you have to do is build your UI.
Creating New Messages
Open message_list.dart and add Message and MessageDao as imports at the top of the file:
import 'data/message.dart'; import 'data/message_dao.dart'; The create a MessageDao inside MessageList, replacing // TODO 1 with:
final messageDao = MessageDao(); Now replace _sendMessage at // TODO 2 with your send message code:
void _sendMessage() { if (_canSendMessage()) { final message = Message(_messageController.text, DateTime.now()); widget.messageDao.saveMessage(message); _messageController.clear(); setState(() {}); } } This code creates a new Message with the _messageController text populated by a TextField in your widget tree. It then uses your MessageDao to save that message to your Realtime Database.
Build and run. You'll see the same screen as you did before:
Try typing in your first message and click Send.
Now go back to your Firebase Console and open your project's Realtime Database. You'll see your message as an entry.

Exciting! Pat yourself on the back for a job well done.
Try adding a few more messages. You can even watch your Realtime Database as you enter each message to see them appear in real time. Pretty cool.
Now you can get to work on displaying those messages.
Reactively Displaying Messages
As previously mentioned, you'll use FirebaseAnimatedList to display your messages. This Widget, provided by the Realtime Database Flutter API, makes displaying lists from your Realtime Database a breeze. It's so plug-and-play, you'll never go back to traditional mobile development again.
RecyclerViews? UICollectionViews? Psshh, who needs 'em!
Add the imports for firebase_animated_list.dart at the top of message_list.dart:
import 'package:firebase_database/ui/firebase_animated_list.dart'; Then replace _getMessageList at // TODO 3 with this code that uses FirebaseAnimatredList:
Widget _getMessageList() { return Expanded( child: FirebaseAnimatedList( controller: _scrollController, query: widget.messageDao.getMessageQuery(), itemBuilder: (context, snapshot, animation, index) { final json = snapshot.value as Map<dynamic, dynamic>; final message = Message.fromJson(json); return MessageWidget(message.text, message.date); }, ), ); } FirebaseAnimatedList requires a Query, which your MessageDao can happily provide via getMessageQuery. It uses that query to get the messages from your Realtime Database.
For each message returned, the itemBuilder from FirebaseAnimatedList triggers and provides message data in JSON form. Then the JSON converts to a Message and your message model constructs and returns a MessageWidget.
Build and run. You'll see your messages in a list:

Enter a new message, and you'll see it appear before your eyes.

Magic.
Try loading your app on two different devices or simulators and watch in awe as you communicate in real time. Who knows, maybe you'll release the next WhatsApp?
Where to Go From Here?
Download the completed version of the project by clicking Download Materials at the top or bottom of this tutorial. Remember, you'll need to add your own Google Services config file for the project to build successfully.
You don't have to use FirebaseAnimatedList. If you need to write something more custom, you can go down to a more traditional Stream approach and write the reactive part yourself using setState or StreamBuilder.
Your _databaseReference has access to a method called onValue that returns a Stream directly. Use this if you would like to integrate with BLoC, Provider or RxDart.
There are plenty of other Realtime Database features which can super-charge your app and give it enterprise-grade features. These include:
- Offline capabilities: All your data stays in sync even when offline.
- Database Rules: Makes your database more secure than Fort Knox.
There are plenty of other great Firebase products you can integrate with. Check out the rest of the Firebase API. Or read our Cloud Firestore tutorial.
Leave a comment below if you have any questions!
raywenderlich.com Weekly
The raywenderlich.com newsletter is the easiest way to stay up-to-date on everything you need to know as a mobile developer.
Get a weekly digest of our tutorials and courses, and receive a free in-depth email course as a bonus!
Firebase Cloud Storage Vs Realtime Database
Source: https://www.raywenderlich.com/24346128-firebase-realtime-database-tutorial-for-flutter
0 Response to "Firebase Cloud Storage Vs Realtime Database"
Post a Comment